Whether you’re uploading your pictures to the Internet for business or pleasure, here are a few tips on how to protect your images online.
Okay. There’s really no way to guarantee that someone won’t steal your photographs online. Even a huge watermark pasted across the middle can be edited out by a novice Photoshop user given the program’s advanced digital imaging tools. And what’s the point of posting an image with a watermark anyway?
“I don’t watermark, it takes away too much from the image,” says fashion and wedding photographer Taralynn Lawton. “If someone really wants to steal your image, they can.”
That’s the risk you take when you post an image online, whether to your own website or to a social media site, each of which has complicated and often moot copyright rules. Just look at Richard Prince’s latest “work.” Prince—the world’s most famous appropriation artist—recently exhibited some three dozen pieces at New York’s Frieze Art Fair taken from other people’s Instagram accounts, priced at $90,000 each.
(Incidentally, Instagram announced last year it would store images in a larger 1080 by 1080 pixel size, up from the 640 by 640 pixel size it’s used since the launch of the platform, which some say is long overdue and others say makes the images more vulnerable, although the smaller size clearly wasn’t a problem for Prince.)
So even though you can’t totally inhibit someone like Prince from screenshotting your image and throwing a hefty price tag on them (you might just have to take that as a compliment!), Taralynn says there are a few best practices you can follow:
Right-size your images
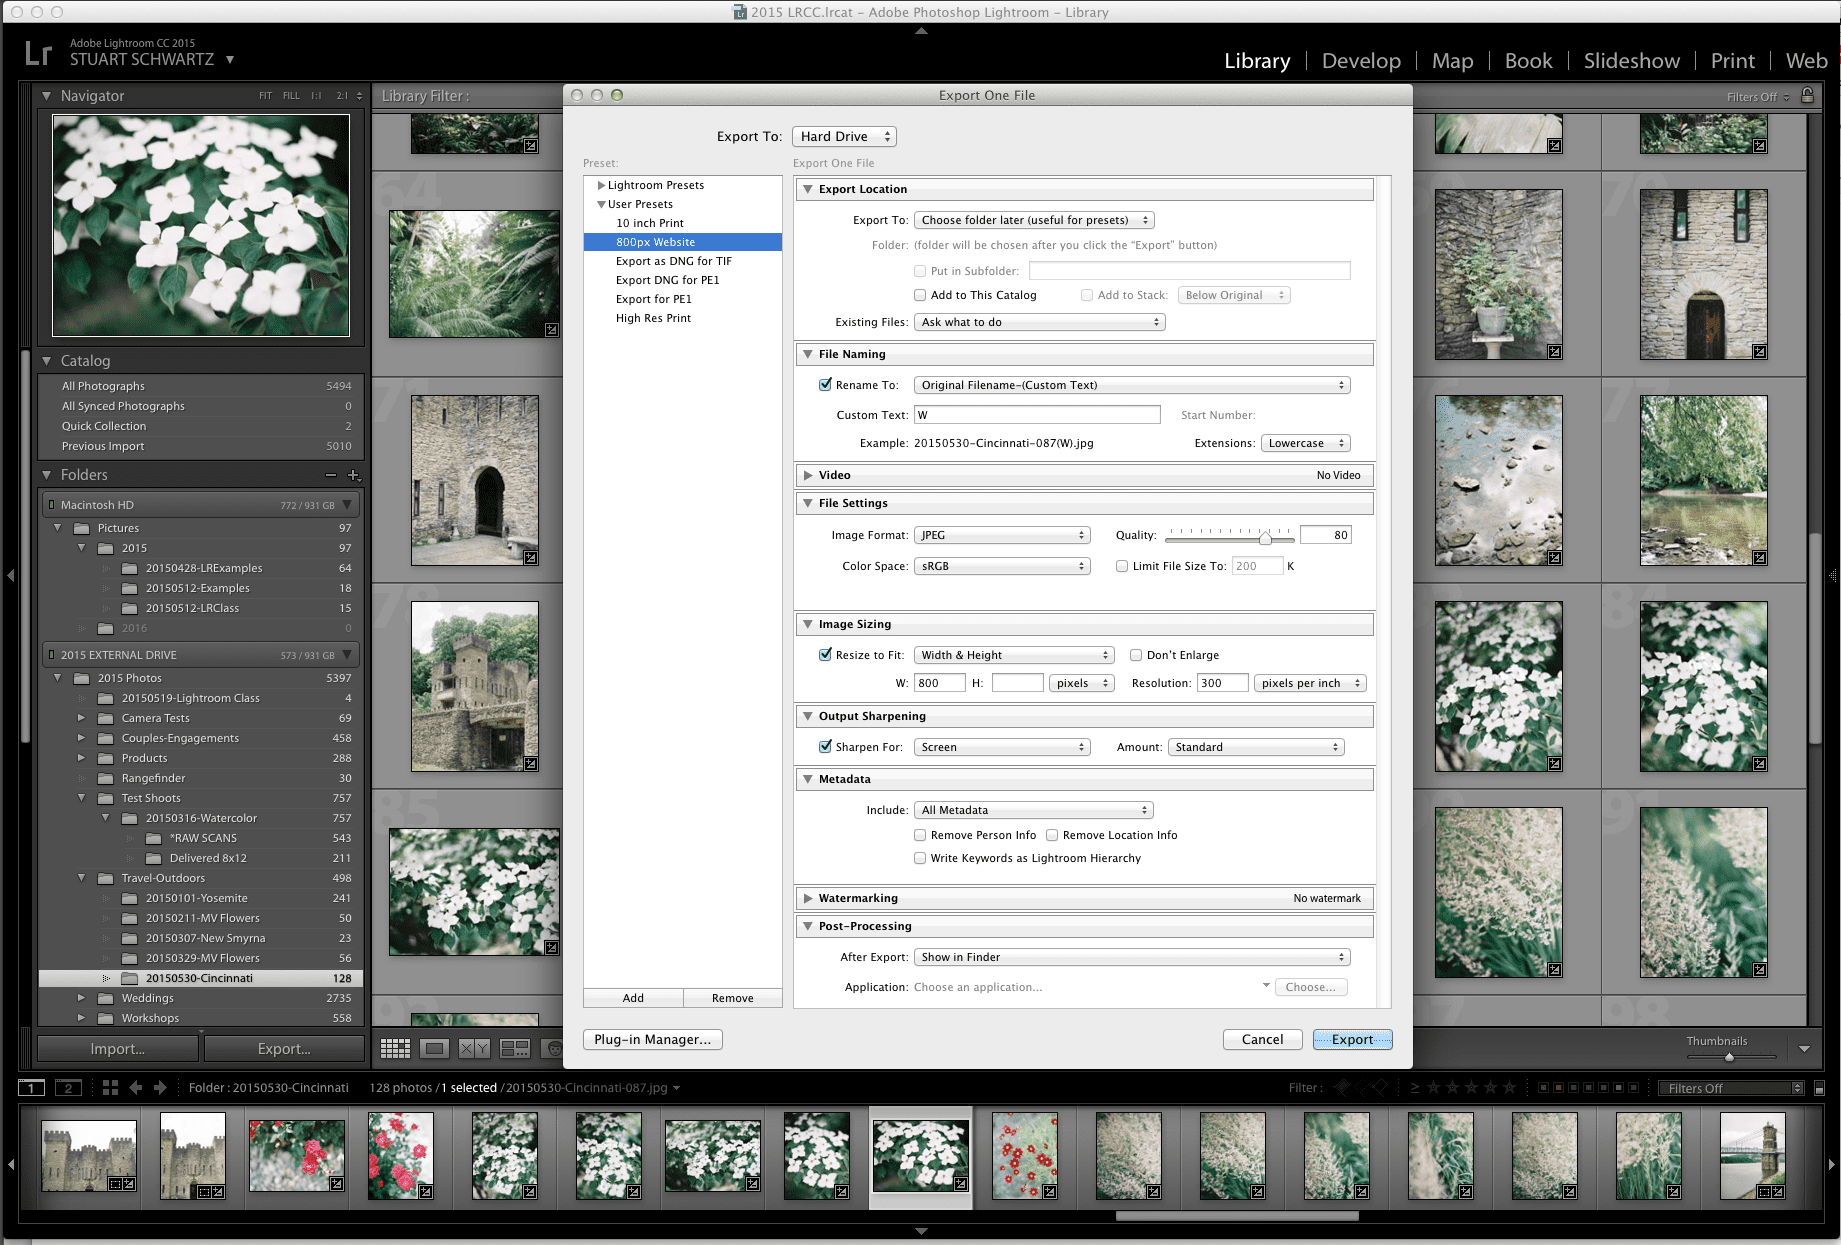
There’s no reason to upload an image file larger than you need for your website or social media account. If you use Lightroom, you can set up presets to make it easy to resize and right-size your images for each website you want to upload them to. Here is a handy infographic with the suggested file sizes for different social media sites.
Use JPEG compression
When you save your right-sized image for the web, Taralynn suggests using a quality of 80 in Lightroom, or 10 in Photoshop. You’ll get a nice, crisp-looking but smaller file, which will make for faster load times on web pages.
Metadata
You may not choose to export all your metadata, but at the very least, you should make sure you embed complete creator and copyright information including your name, website, and contact information. Taralynn suggests adding and embedding as much of this information as possible. This can be done as a batch on import (Taralynn goes over this in-depth her workshop, or check out this guide), or later on each individual image when working in the Library module.
Tag and be tagged
When you upload images to social media or your website, make sure to give credit where credit is due, especially when it took a team to make an image. That means tagging everyone involved with creating the image from hair and makeup to the production studio, editor, or models if applicable. “I’m really diligent about tagging anyone and everyone who’s involved in the photo, and I hope that they’ll do it for me too,” says Taralynn.
You’ll learn these techniques and more in Lightroom Fundamentals with Nathan Lomas starting July 25. Click the link to sign up for the next session!